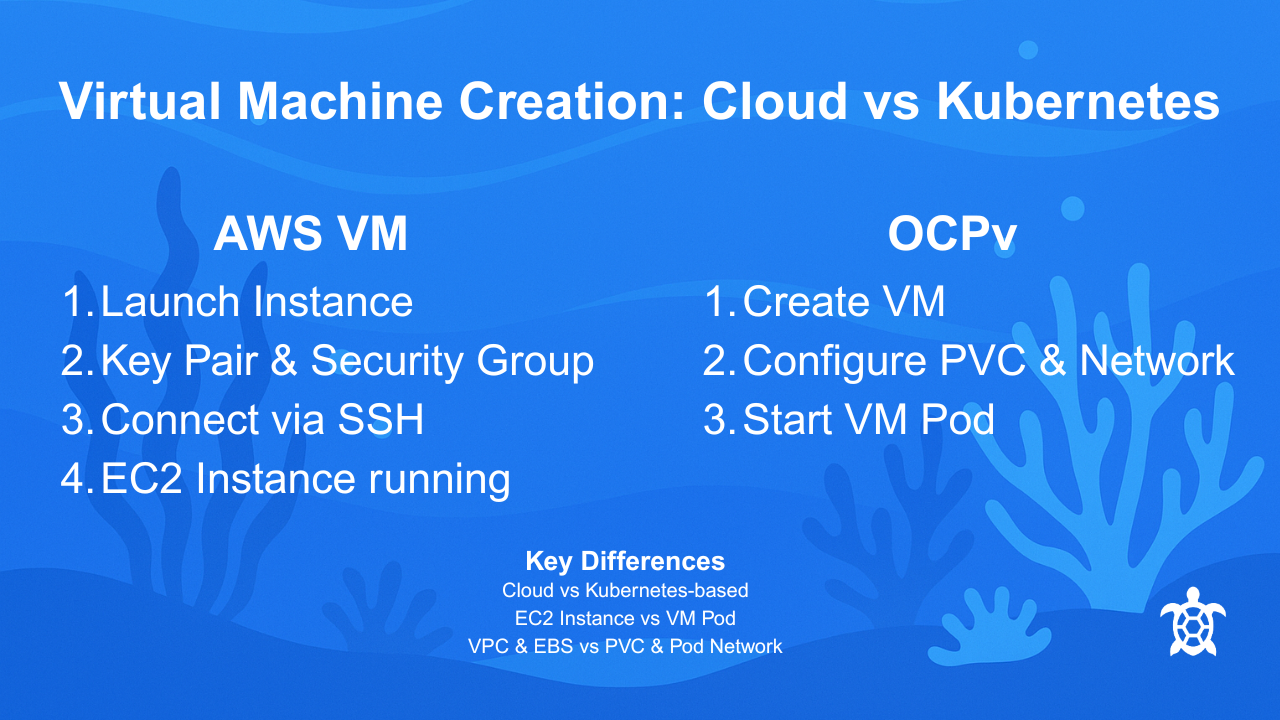
OpenShift Virtualization Demo
This guide walks through the process of creating a virtual machine using OpenShift Virtualization.
OpenShift Virtualization allows teams to run traditional virtual machines directly inside a Kubernetes platform, alongside containers and cloud-native workloads.
This demo is designed for learning and training purposes and shows the basic workflow used by engineers to create and run a VM inside OpenShift.
It is part of the Turtini Training Loop, a series of short operational guides focused on building practical infrastructure skills.
Overview
In this demo we will:
Log into the OpenShift console
Navigate to the Virtualization section
Create a new virtual machine
Configure storage and networking
Launch the VM
Connect to the virtual machine console
Estimated time: 10–15 minutes
Architecture Overview
The virtual machine will run inside the Kubernetes cluster using OpenShift Virtualization.
User
│
▼
OpenShift Web Console
│
▼
OpenShift Virtualization
│
▼
Virtual Machine
│
▼
Persistent Storage + Networking
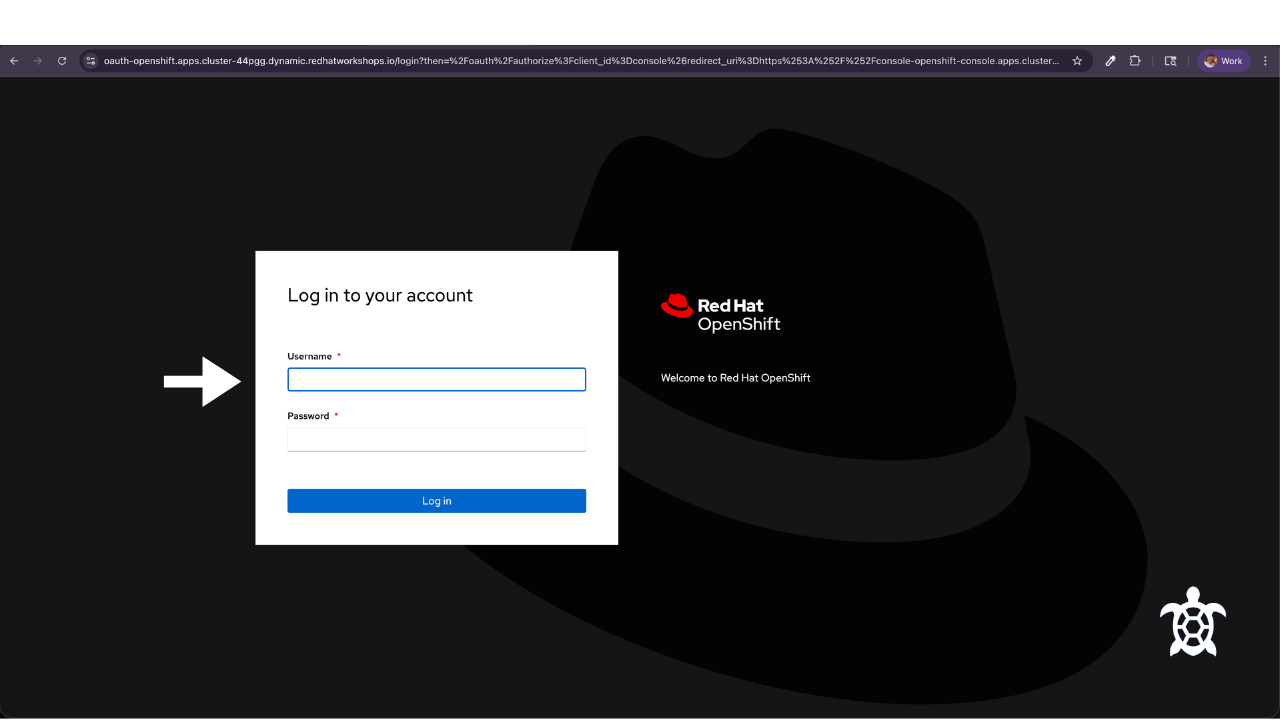
Step 1 — Log into OpenShift
Access today’s Lab Environment:
https://console-openshift-console.apps.cluster-wmjhg.dynamic.redhatworkshops.io/
Your username and password will be provided to you.
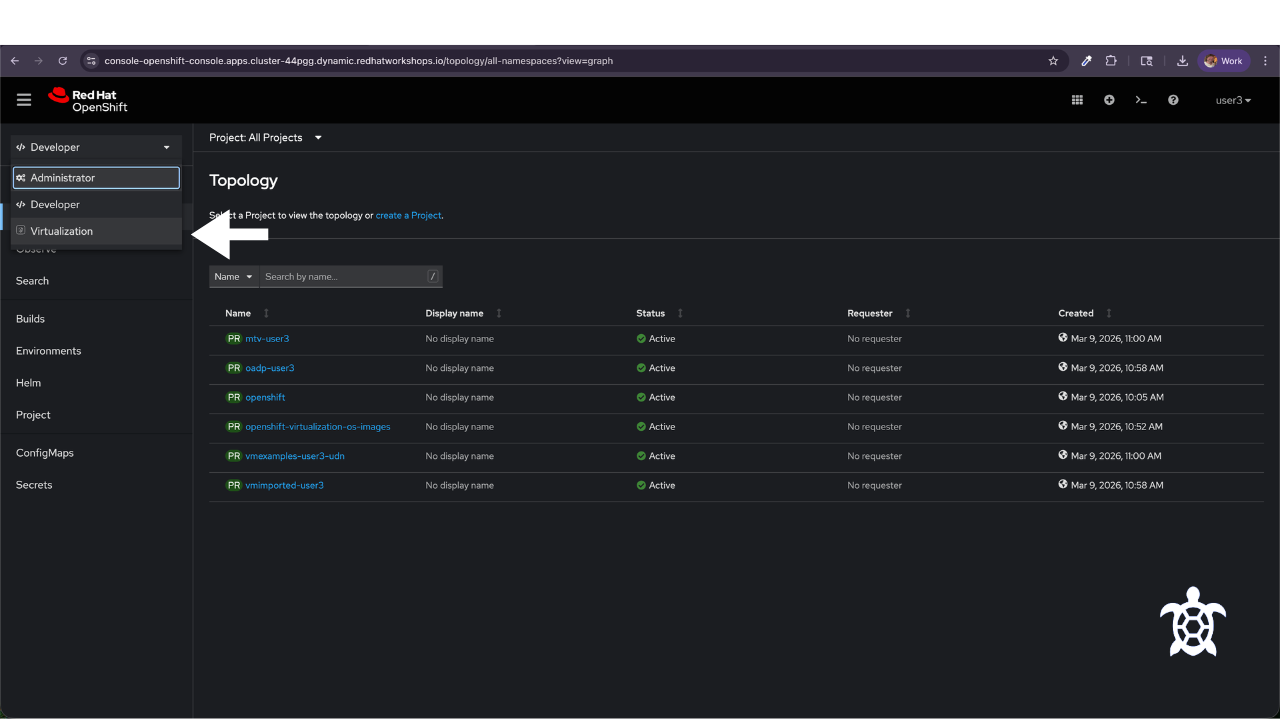
Switch to the Virtualization perspective
You should now see the OpenShift dashboard along with a popup to Create a VirtualMachine unless the popup has been disabled.
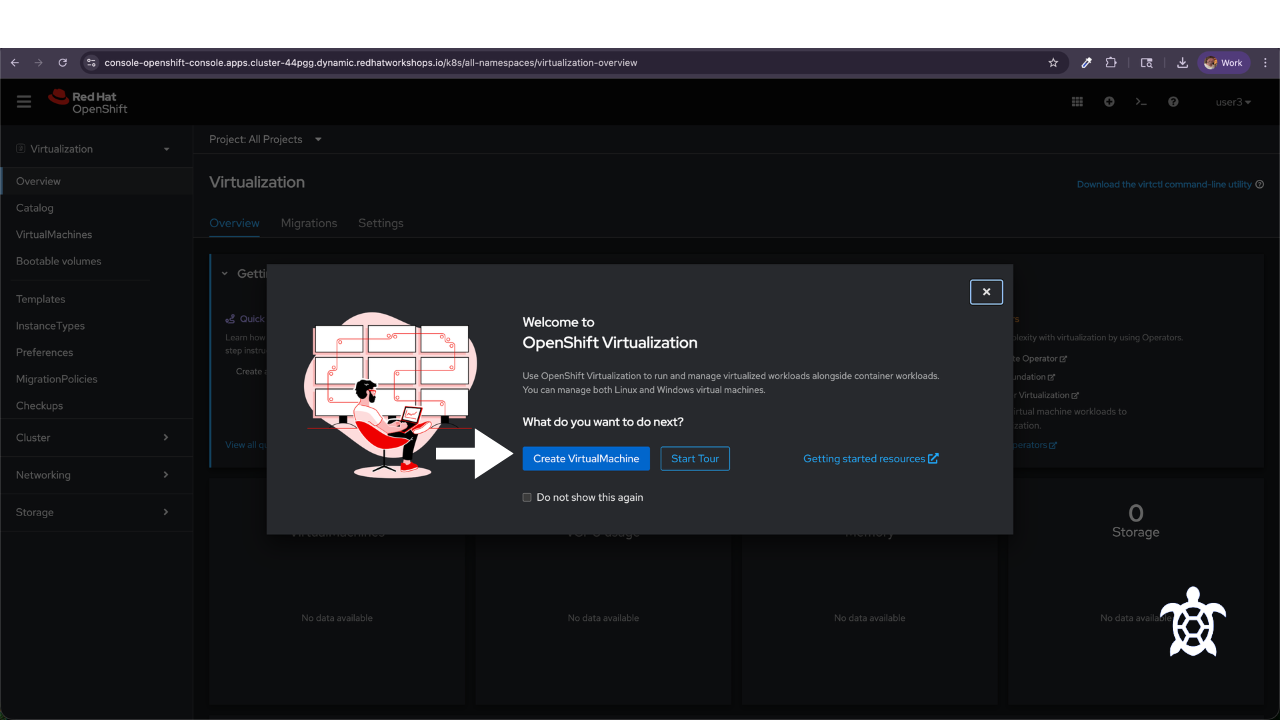
Note: The Virtualization persona is available only when Red Hat OpenShift Virtualization is installed and properly configured. In this lab environment the installation and configuration has already been performed for us.
Step 2 — Navigate to Virtualization (Skip if you were able to click on Create a VirtualMachine from the popup)
From the left navigation menu:
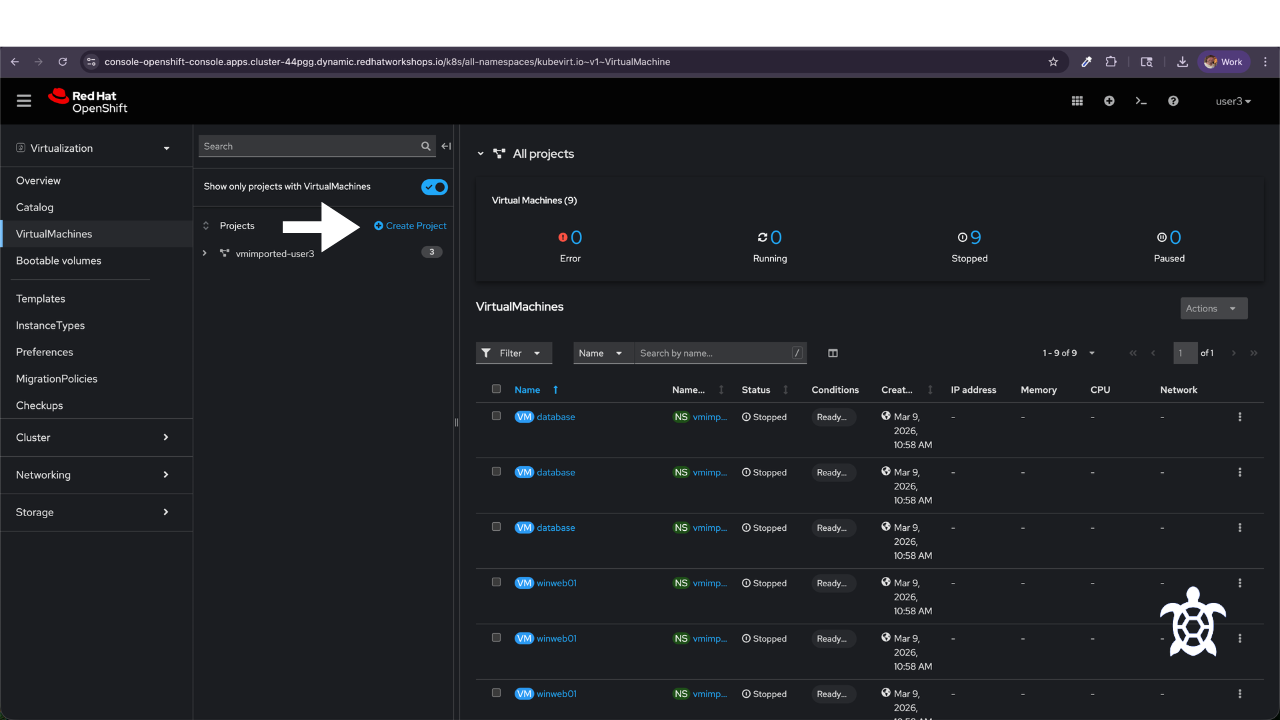
Select VirtualMachines
This section allows you to create and manage virtual machines within the cluster.
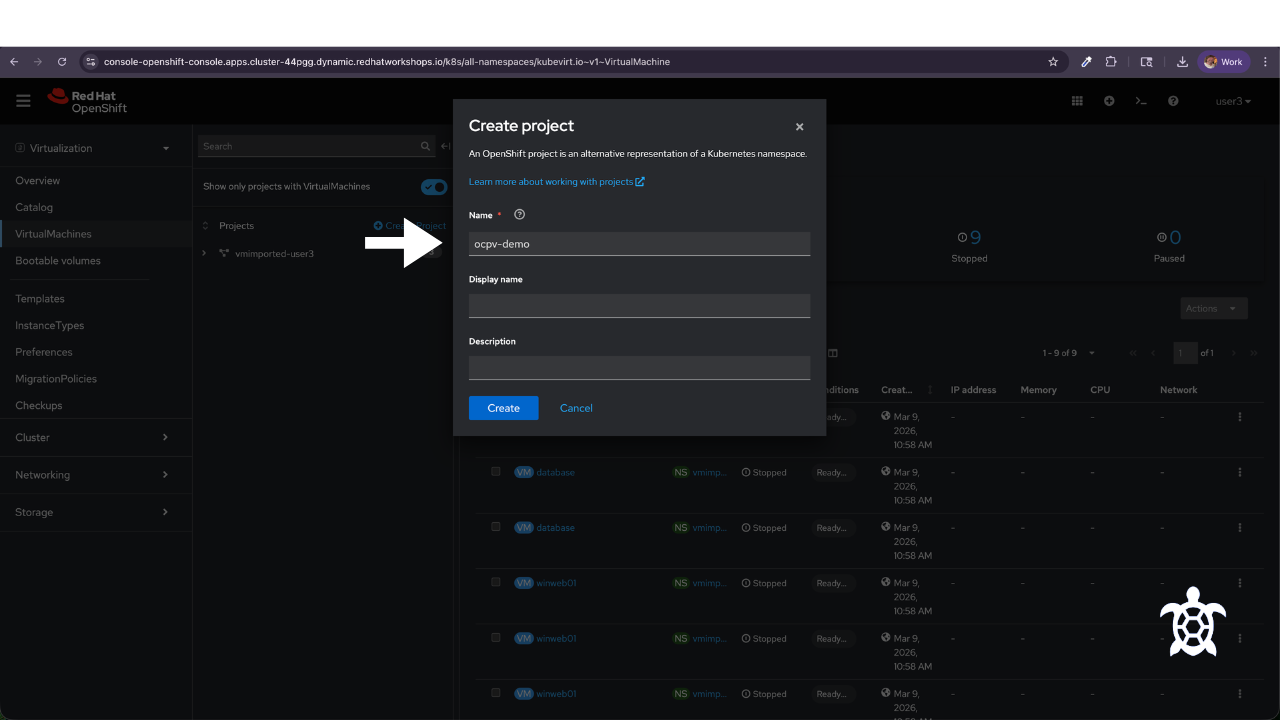
Click + Create Project
Name the project ocpv-demo
Step 3 — Create a Virtual Machine
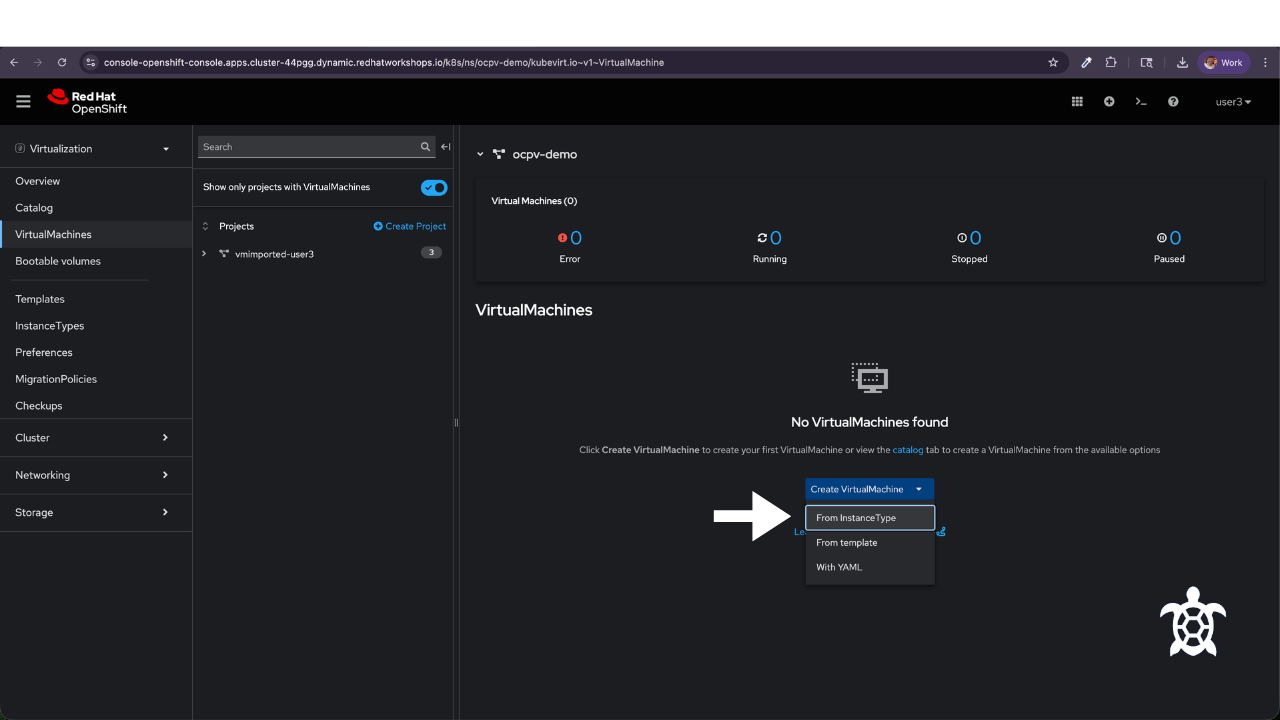
Click Create VirtualMachine.
Choose From InstanceType
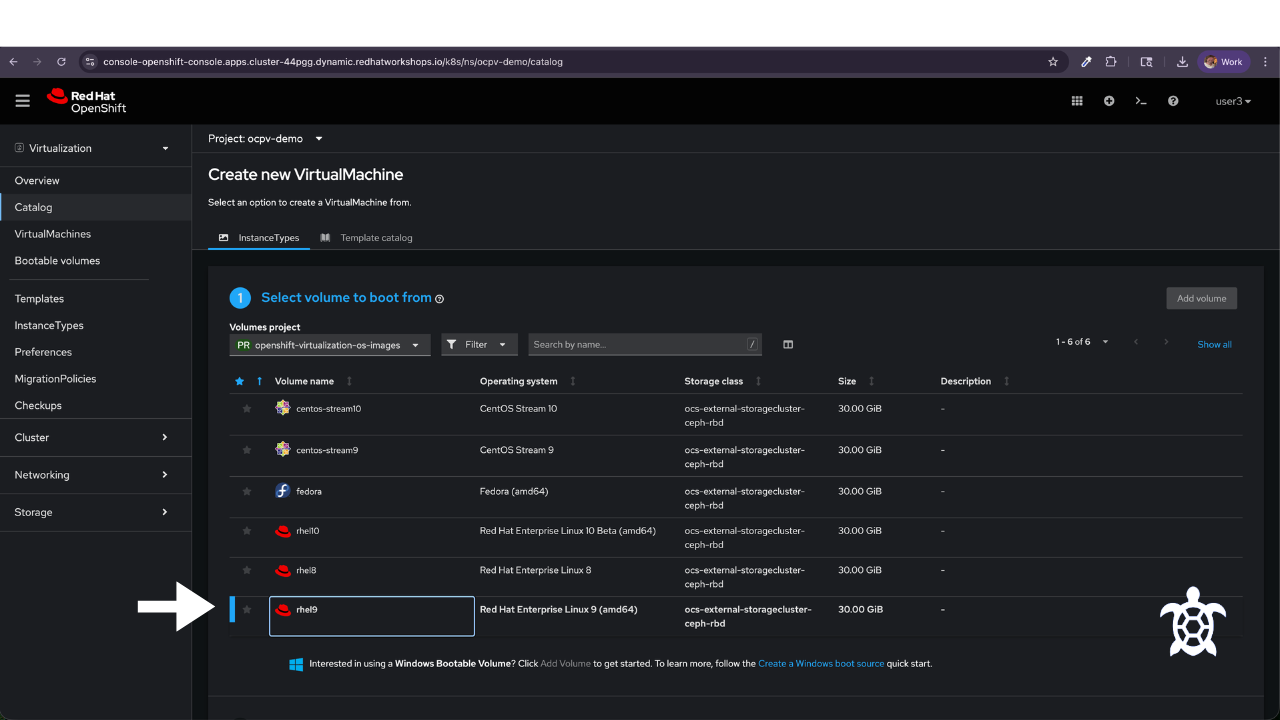
Under 1 Select volume to boot from choose rhel9
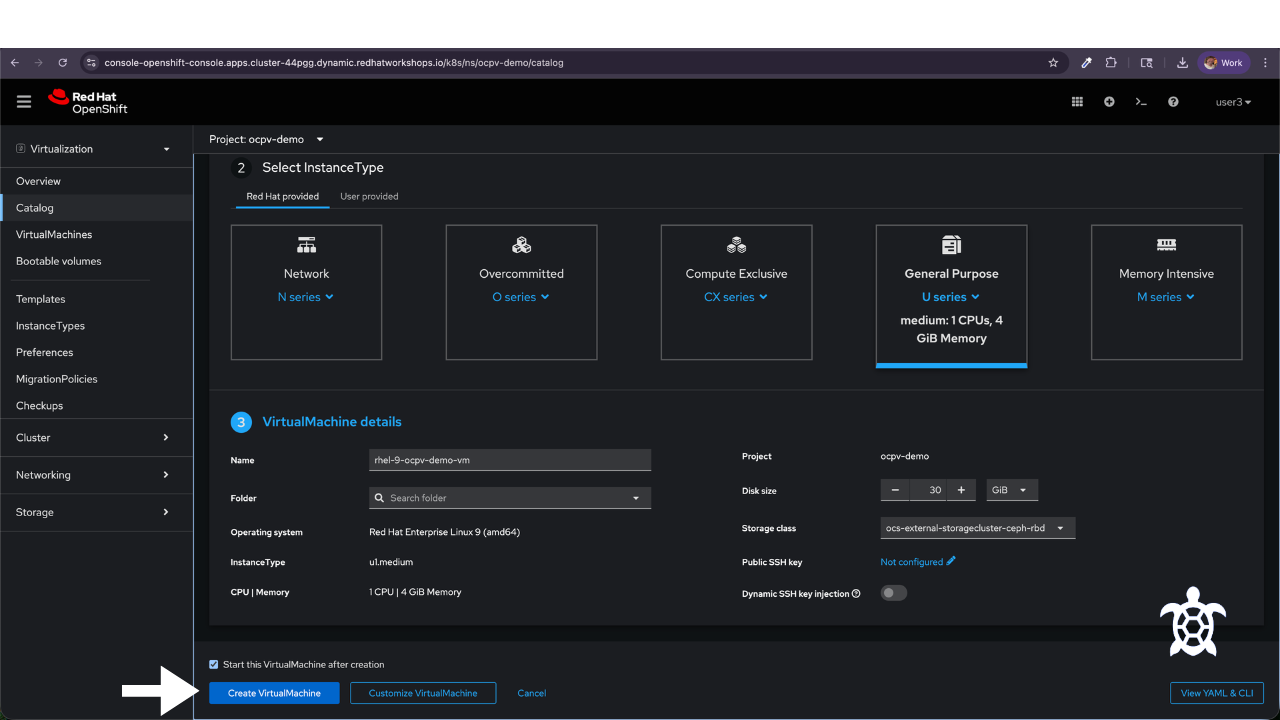
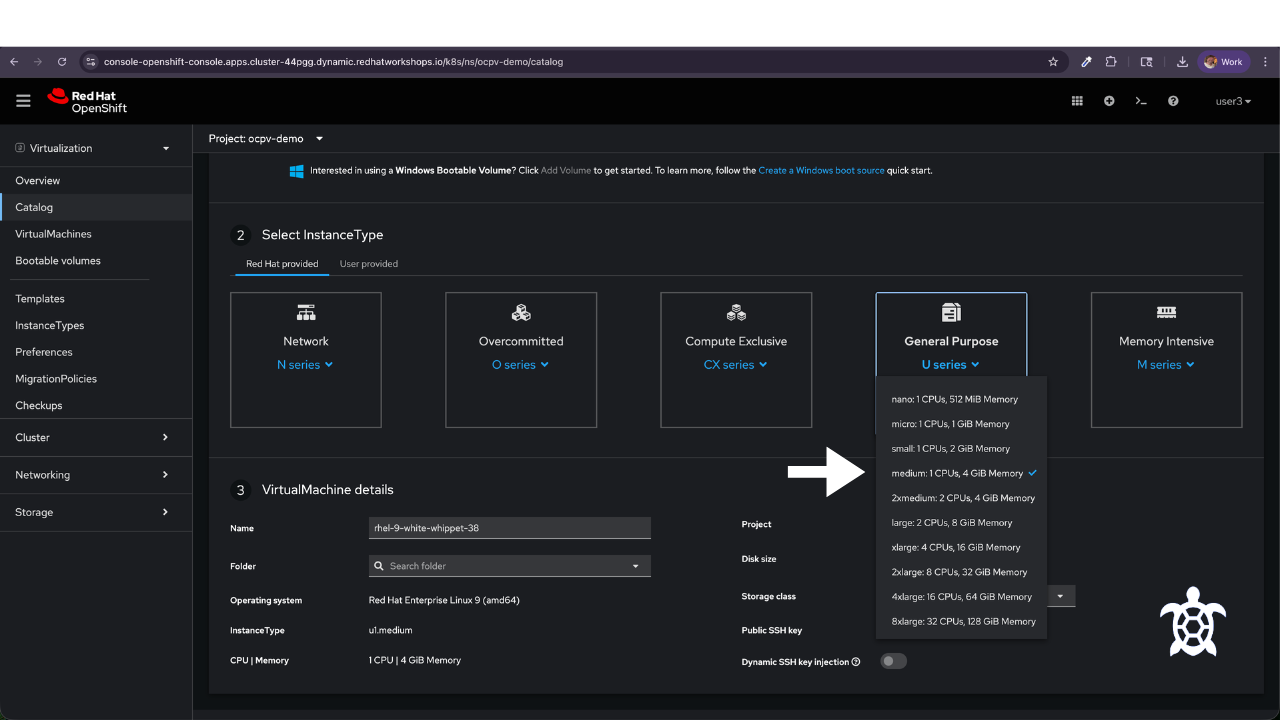
Choose under 2 Select Instance Type General Purpose U Series and keep the default configuration - medium, 1 CPUs, 4 GiB Memory.
Under 3 VirtualMachine details, provide a name for the VM.
rhel-9-ocpv-demo-vm
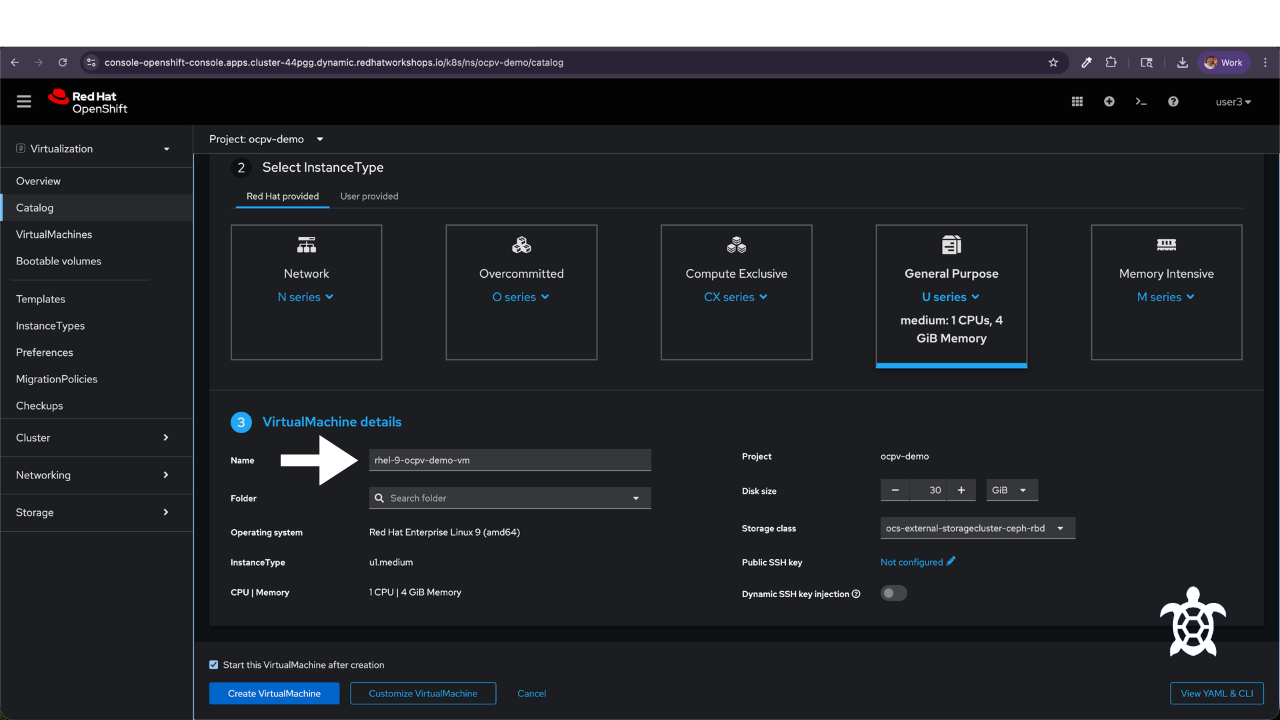
Keep all the other settings the same.
CPU: 1 Memory: 4 GiB Disk size: 30 GiB Storage class: ocs-external-storagecluster-ceph-rbd
OpenShift will automatically provision storage for the VM disk.
Typical configuration:
Persistent Volume Claim (PVC)
Container-native storage
Cluster storage class
The template will create a Persistent Volume Claim (PVC) using the defaults. You do not have to change the Storage Class for our demo.
Example size:
30 GiB
Storage Class example:
ocs-external-storagecluster-ceph-rbd
By default, the VM will attach to the pod network. This allows the VM to communicate with other workloads inside the cluster. For this demo, use the default cluster network configuration.
Advanced configurations include:
Multus networks
VLAN attachment
SR-IOV
The VM will receive a network interface connected to the OpenShift cluster network.
Step 4 — Launch the VM
Click Create Virtual Machine.
The platform will begin provisioning the VM and attaching storage and networking.
Provisioning typically takes 30–90 seconds depending on the cluster.
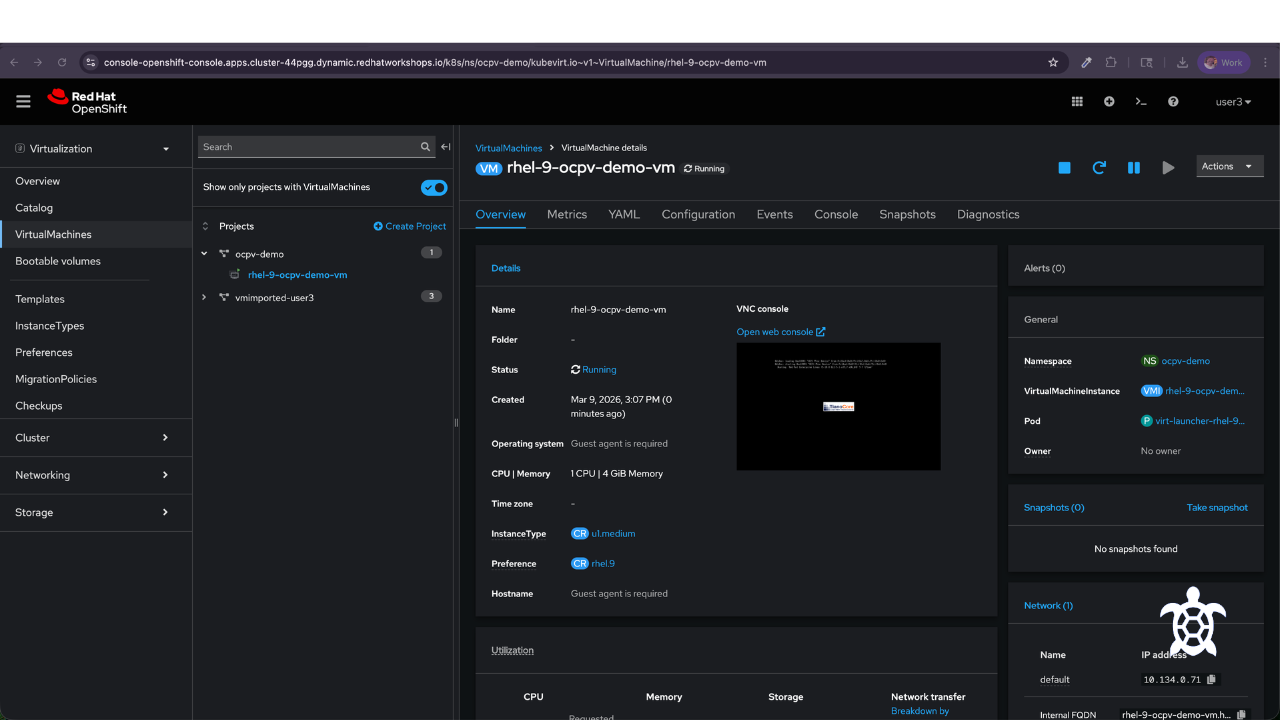
Step 5 — Access the Console
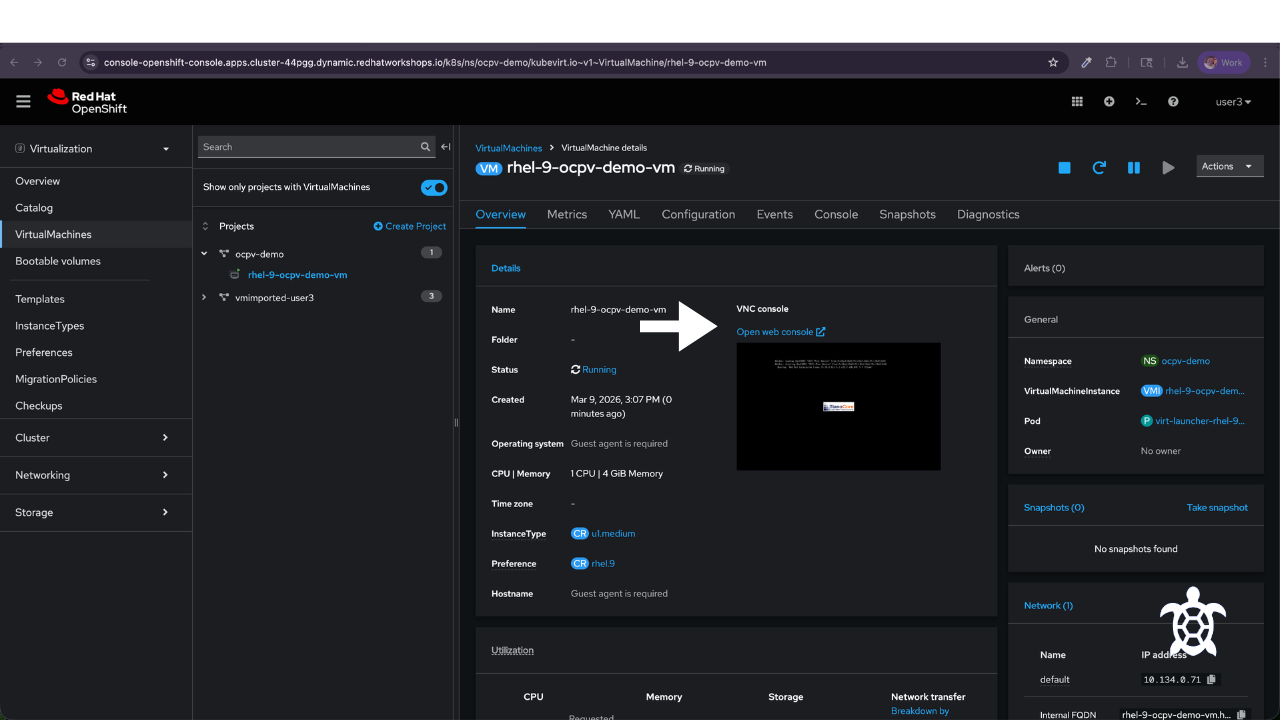
Click Open web console
OpenShift has already created:
A Virtual Machine Instance
A launcher pod
Attached storage
Booted the OS
The console provides direct access to the operating system running inside the VM.
Step 6 — Verify the VM
Log into the virtual machine using the credentials configured in the template. To login, you will need to first copy the User name which will be rhel, then click Paste to console. Then, click to copy Password then click Paste to console
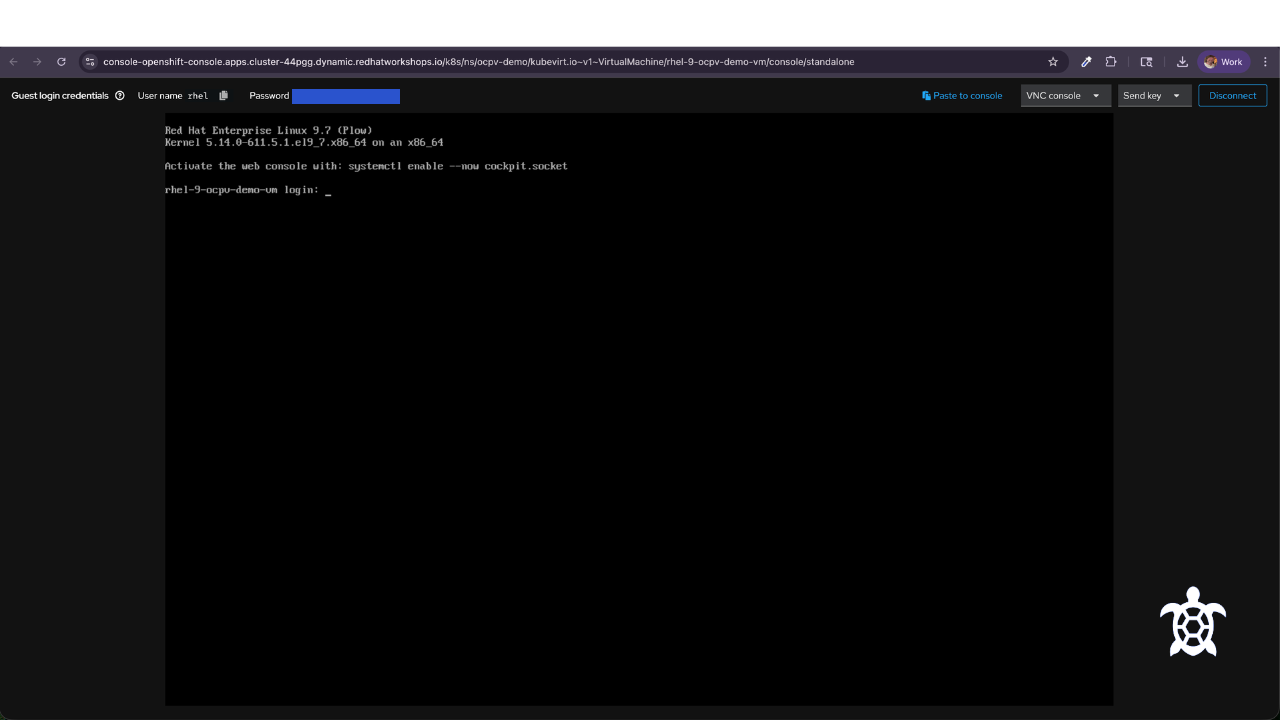
Once logged in, manually type commands and run:
uname -a
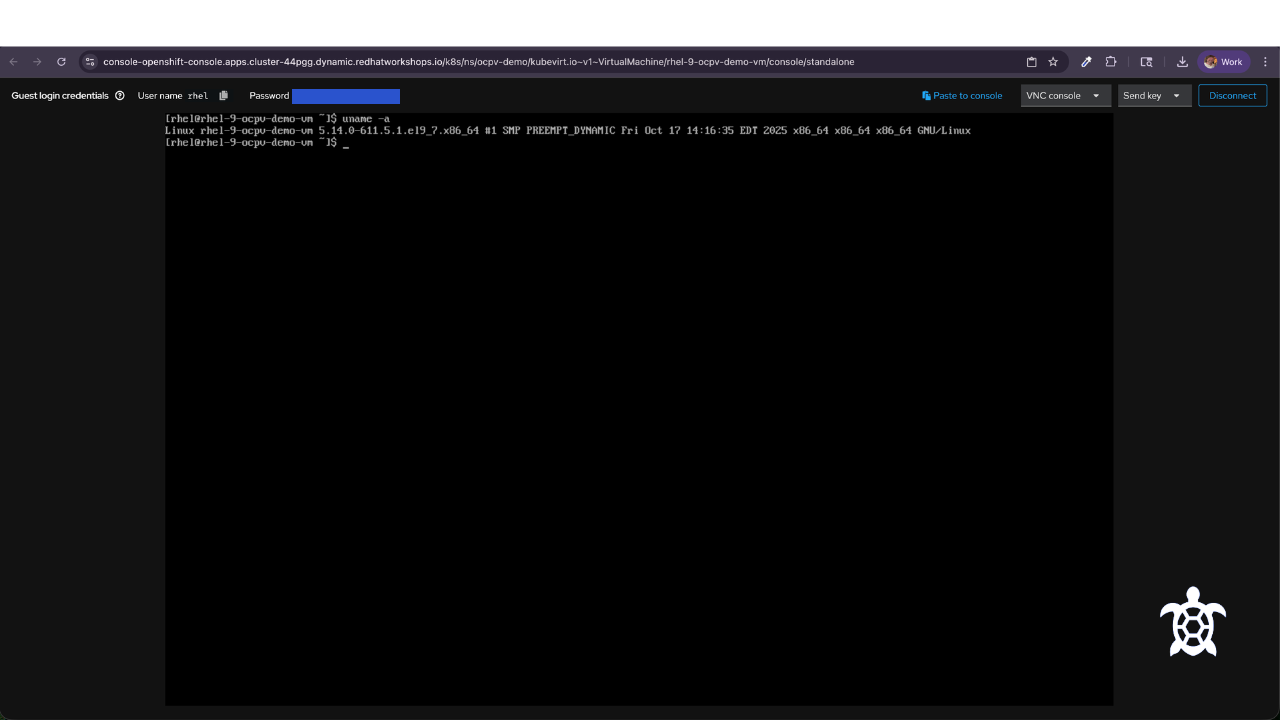
This confirms the VM is running successfully inside the Kubernetes cluster.
Inside the console, also run:
hostnamectl
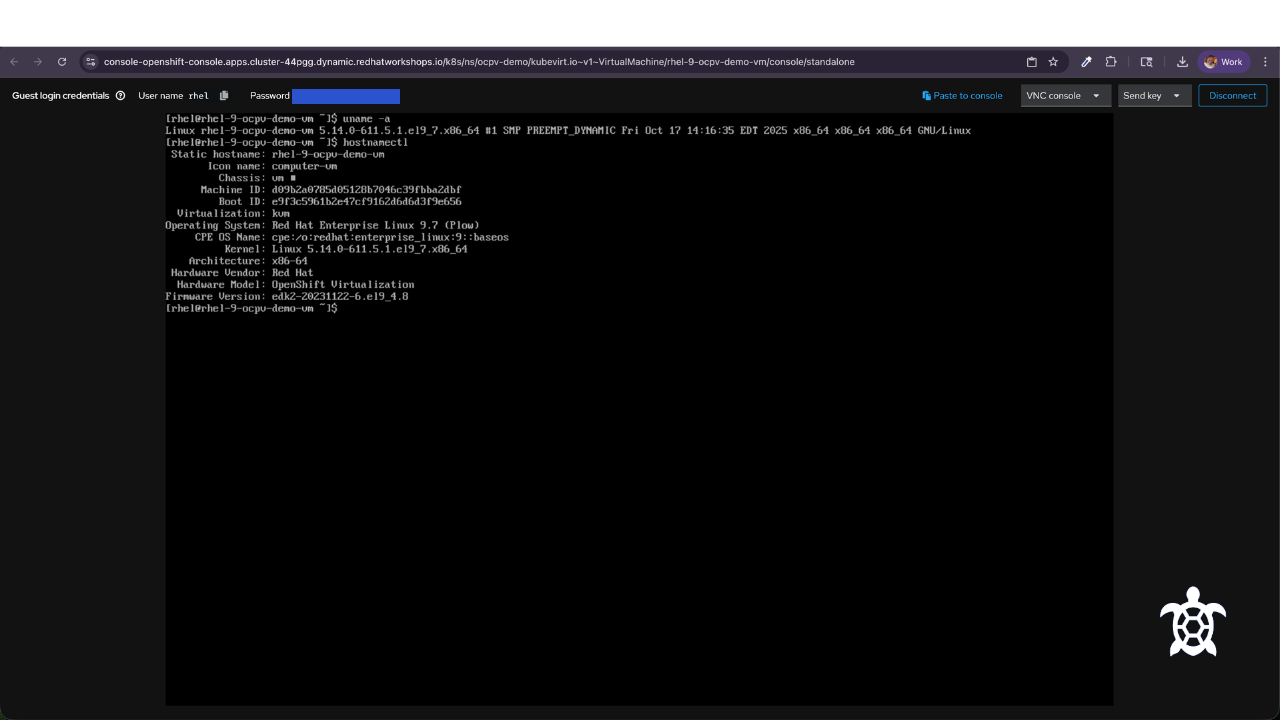
OpenShift Virtualization runs VMs using KubeVirt, QEMU, & KVM. The VM runs inside a Kubernetes pod called a virt-launcher. This allows VMs and containers to share the same cluster infrastructure.
Demo Complete
You have successfully:
Created a virtual machine inside OpenShift
Provisioned storage and networking
Accessed the VM console