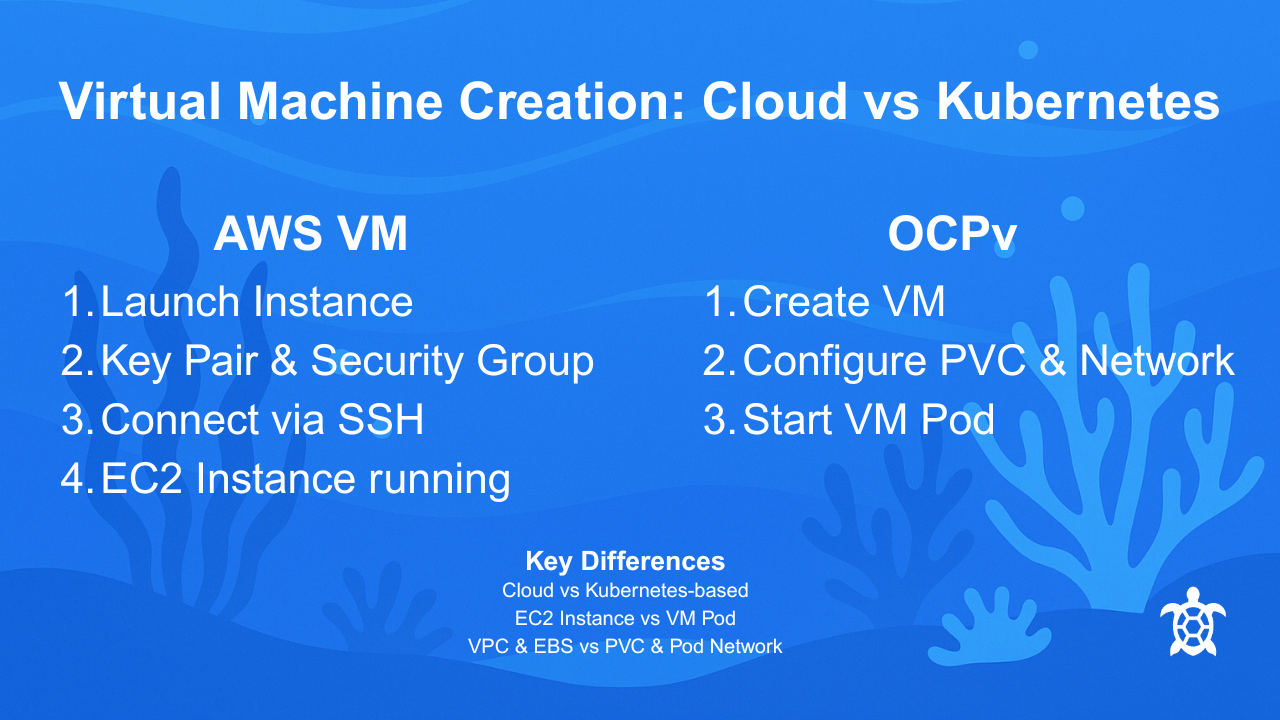
AWS EC2 VM Creation Demo
This guide walks through the process of creating a virtual machine (EC2 instance) in Amazon Web Services.
The demo is designed for learning and training purposes and shows the basic workflow used by engineers to launch a virtual machine in AWS.
It is part of the Turtini Training Loop, a series of short operational guides focused on building practical infrastructure skills.
Overview
In this demo we will:
Log into the AWS Console
Navigate to the EC2 service
Launch a new virtual machine
Configure networking and access
Connect to the instance
Verify the VM is operational
Estimated time: 10–15 minutes
Architecture Overview
The virtual machine will run inside a Virtual Private Cloud (VPC) and be accessible via SSH.
User
  │
  ▼
AWS Console
  │
  ▼
EC2 Service
  │
  ▼
Virtual Machine (EC2 Instance)
  │
  ▼
Security Group + Networking
Step 1 — Log into AWS
Open the AWS Console at https://console.aws.amazon.com
Sign in with your AWS account credentials
From the Services menu select EC2 or in the search bar type:
EC2
Click EC2
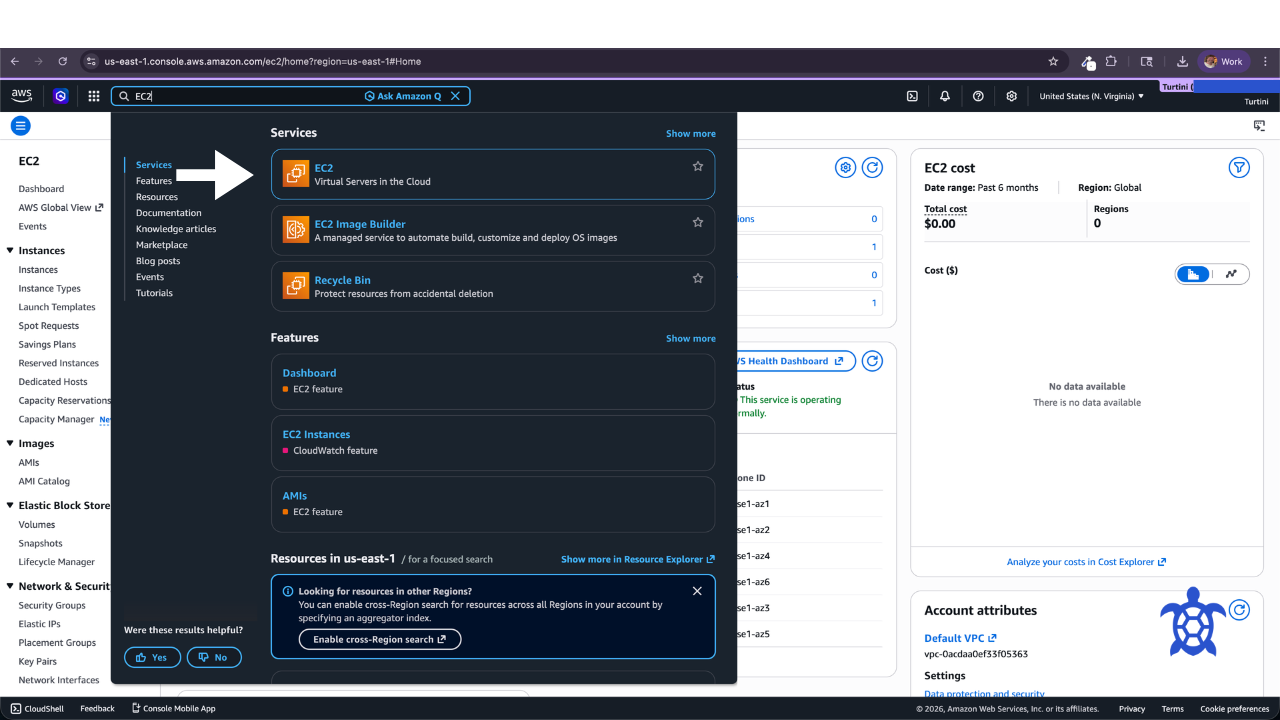
You should now see the EC2 dashboard.
Step 2 — Launch a New Instance
Click Launch Instance
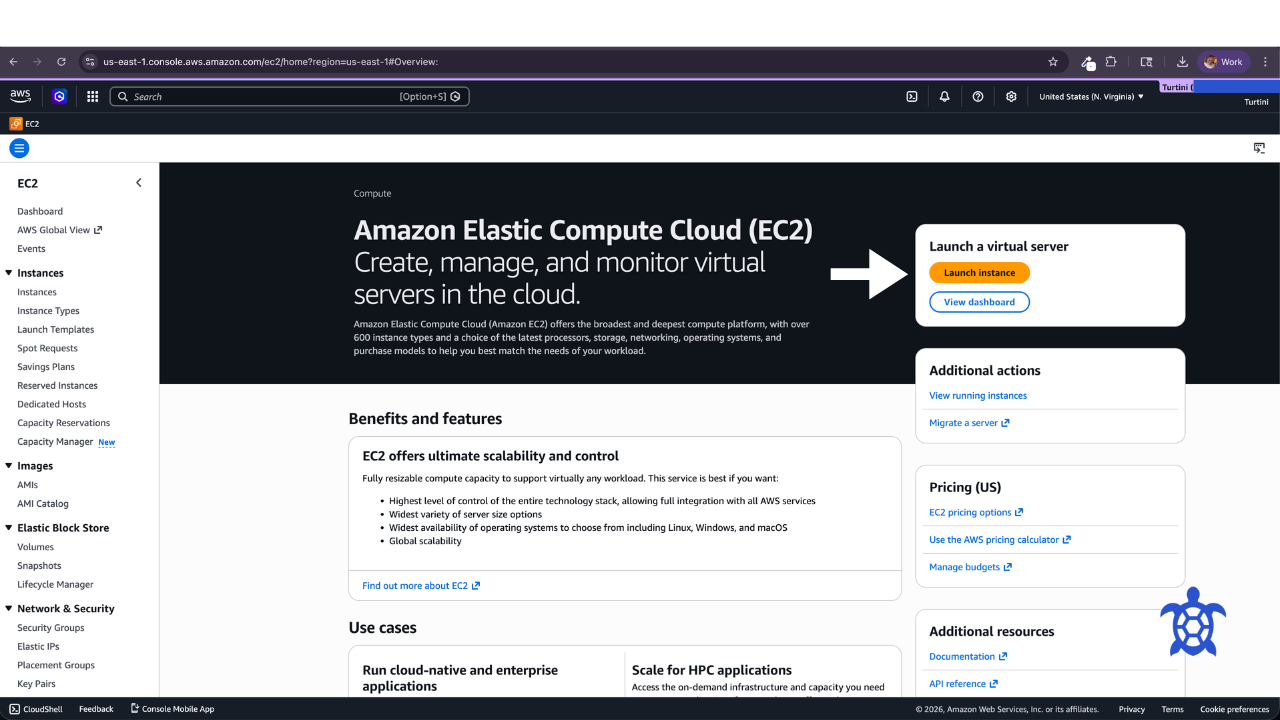
Click Launch without a wakthrough
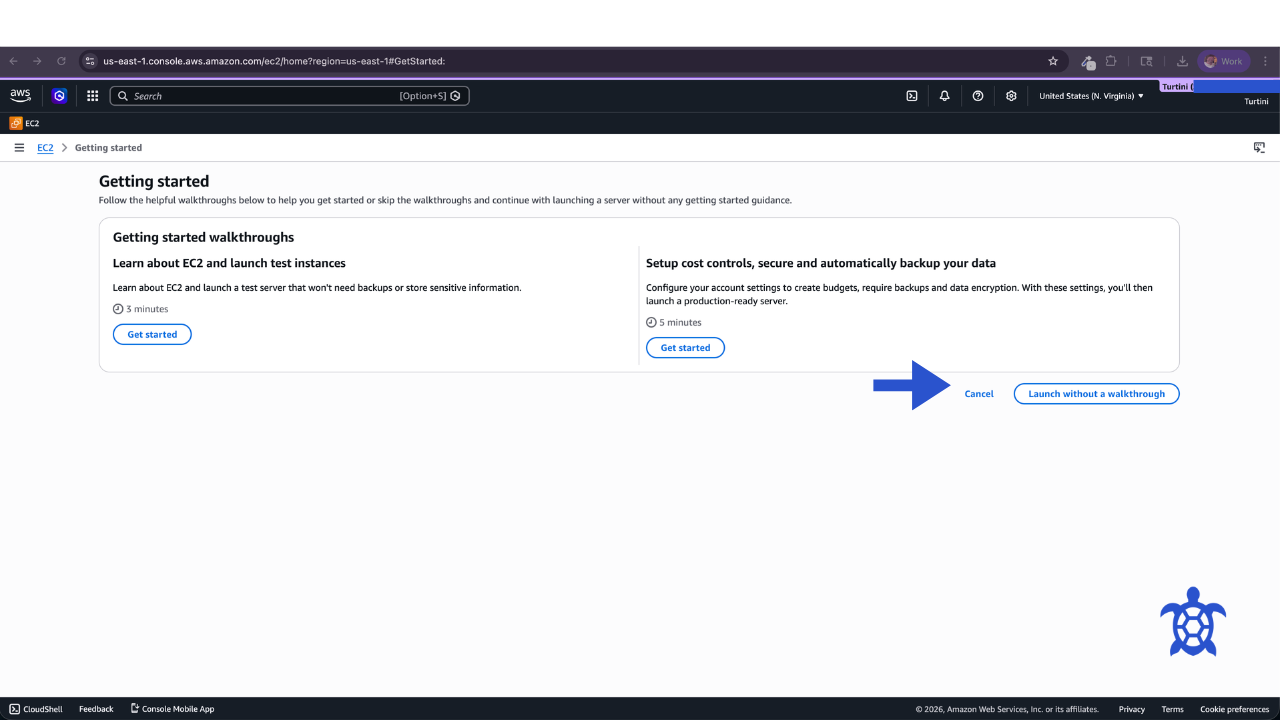
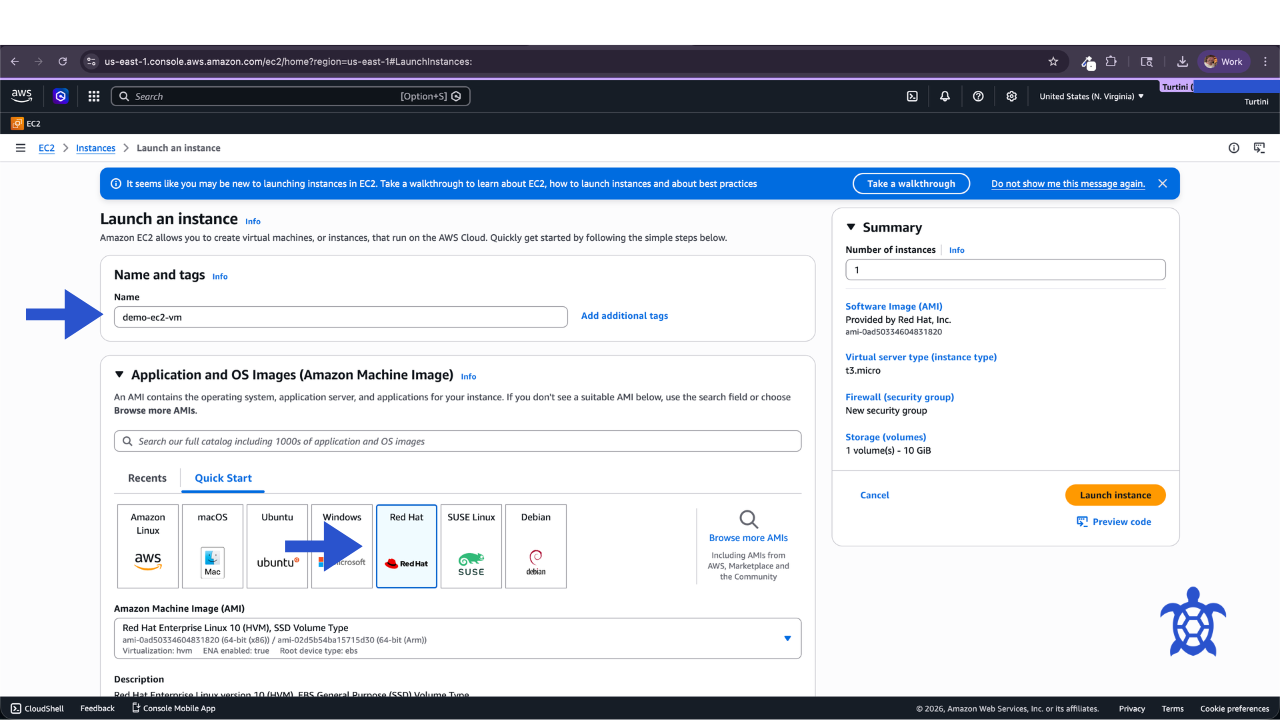
Provide a name for the instance
Example:
demo-ec2-vm
Select Red Hat under Application and OS Images (Amazon Machine Image) or AMI.
Step 3 — Choose Instance Type
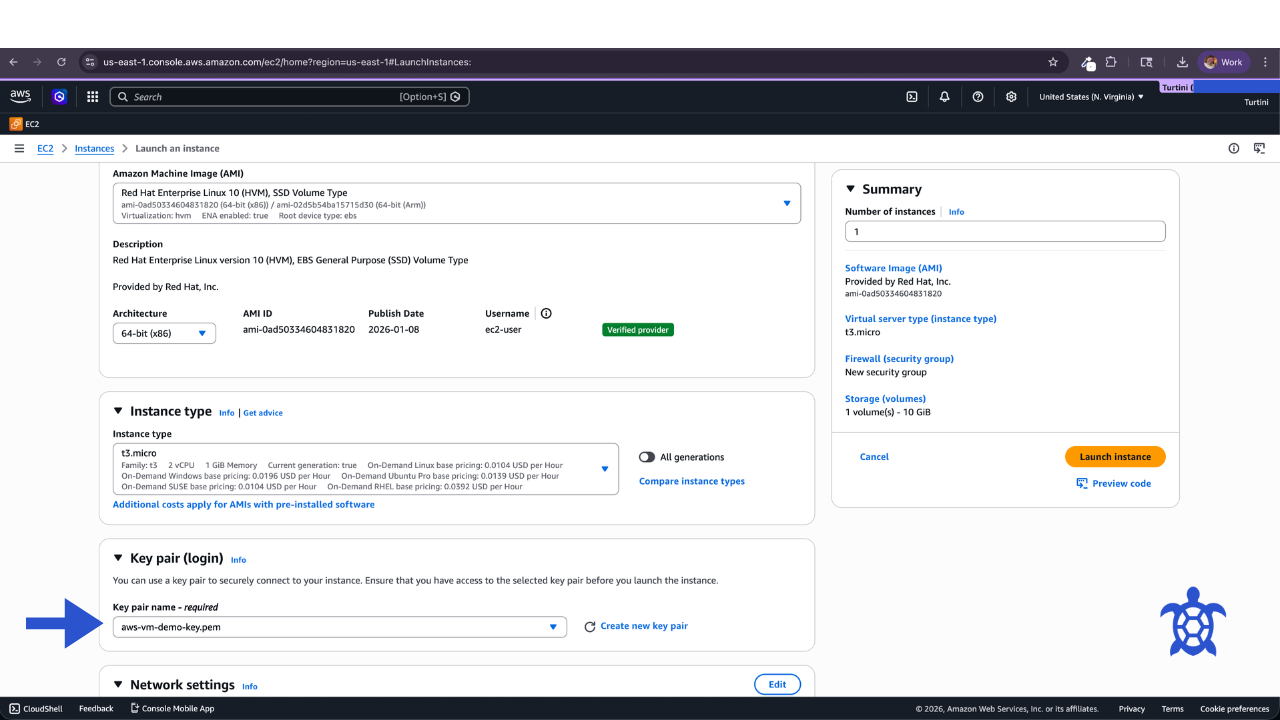
Select a small instance type for the demo.
Example:
t2.micro
This instance type is commonly included in the AWS free tier.
Step 4 — Configure Access
Create or select an SSH key pair.
Name:
aws-vm-demo-key.pem
Key type:
RSA
Format:
.pem
Download and store this key securely.
Step 5 — Configure Networking
Use the default VPC settings for the demo.
Recommended settings:
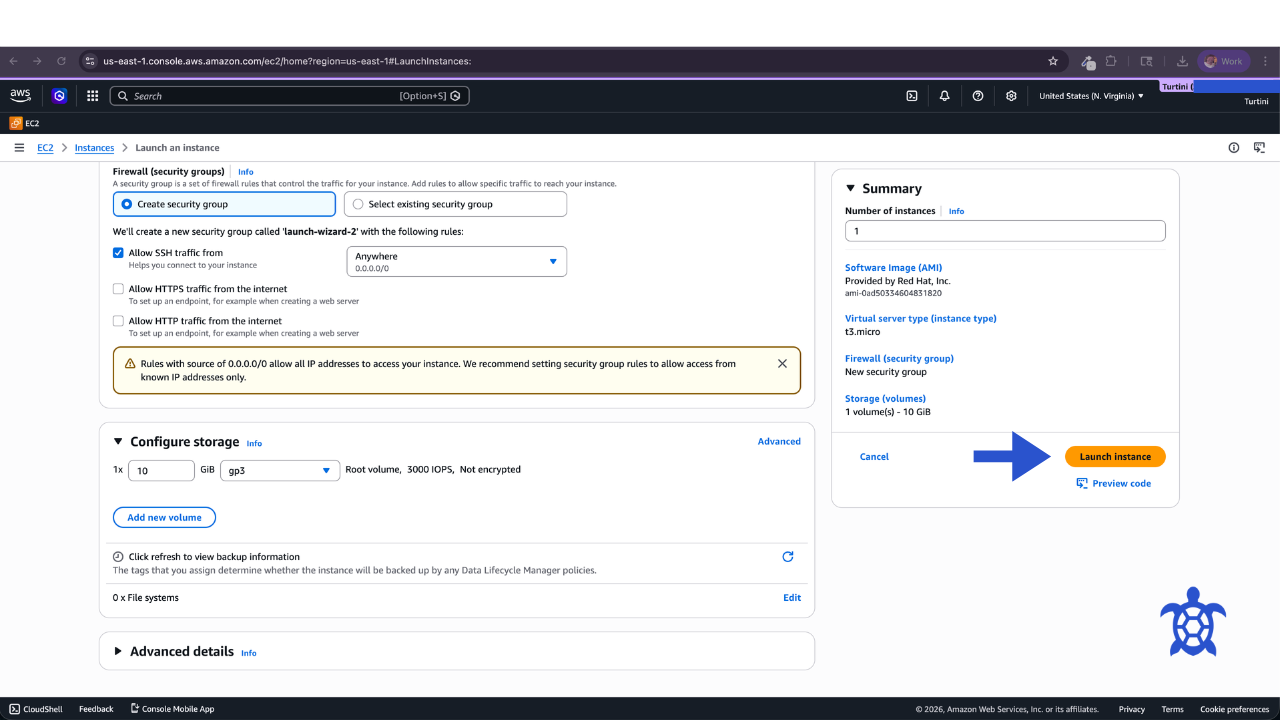
*Create security group
Allow SSH traffic from anywhere
1 x10 GiB gp3 Root volume, 3000 IOPS, Not encrypted
This creates the necessary security group rules to allow access to the VM.
The default storage settings are fine:
10 GiB pg3
Step 6 — Launch the Instance
Click Launch Instance.
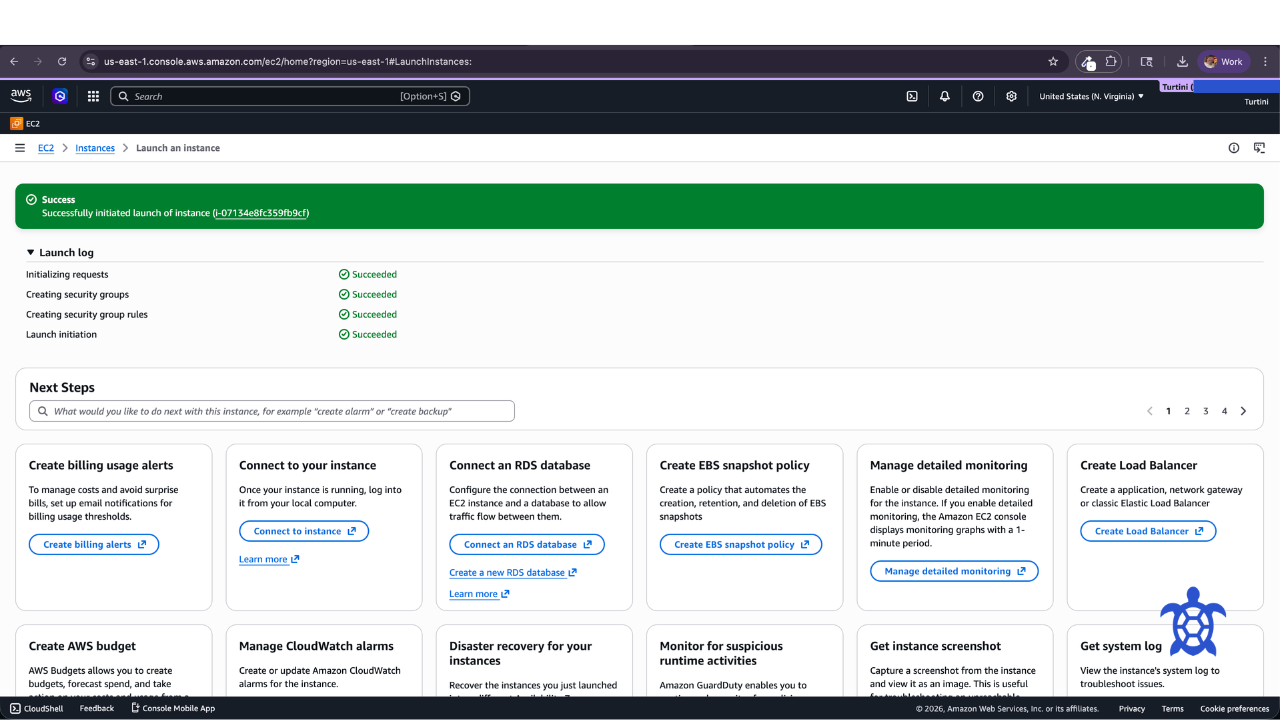
AWS will begin provisioning the virtual machine.
Provisioning typically takes 30–60 seconds.
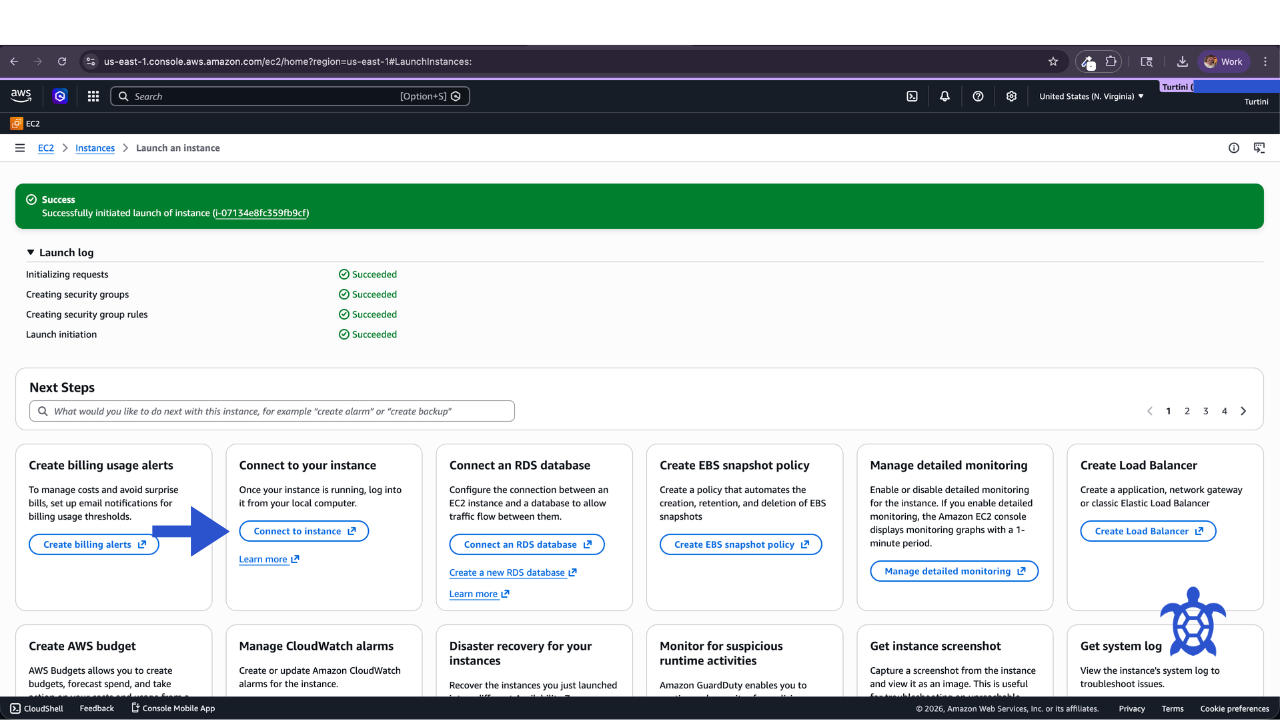
Step 7 — Connect to the VM
From the EC2 dashboard:
Click Connect to your instance
Use either:
EC2 Instance Connect
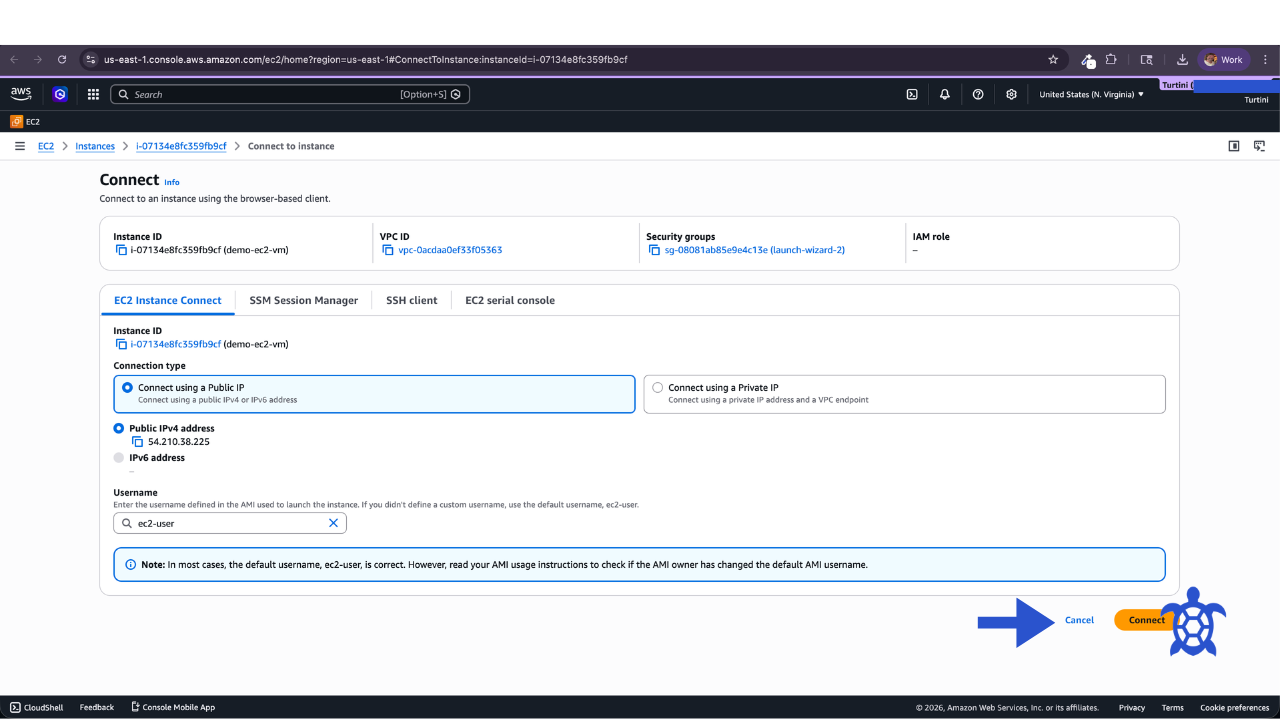
SSH from your terminal
Example SSH command:
ssh -i aws-vm-demo-key.pem ec2-user@INSTANCE_PUBLIC_IP
Example:
ssh -i aws-vm-demo-key.pem ec2-user@54.191.10.25
Step 8 — Verify the VM
Once connected, run:
uname -a
This confirms the virtual machine is running and accessible.
Review your OS information by running:
cat /etc/os-release
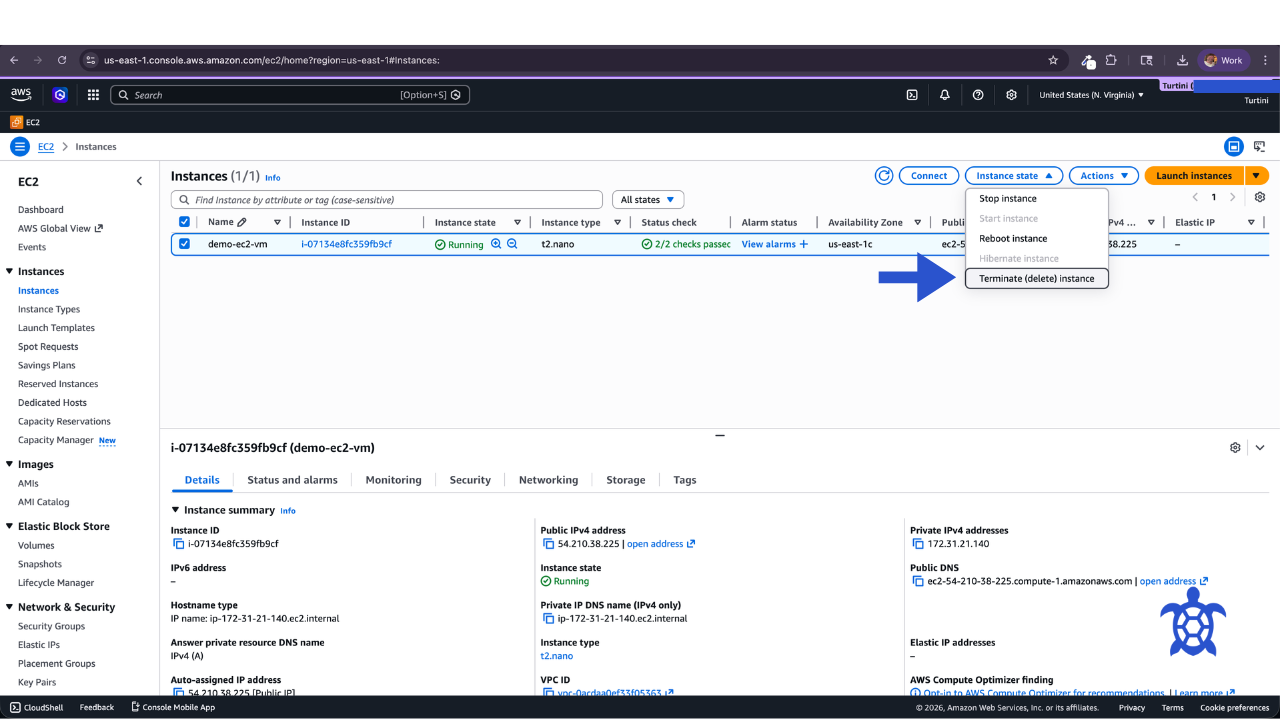
Step 9 — Stop or Terminate your VM
To avoid charges, from the AWS Console, access the EC2 dashboard again.
Open the AWS Console at https://console.aws.amazon.com
Sign in with your AWS account credentials
From the Services menu select EC2 or in the search bar type:
EC2
Click EC2
You should now see the EC2 dashboard.
Select Instances
Select Instant State and select Stop or Terminate. This stops or terminates the VM.
Demo Complete
You have successfully:
Created a virtual machine in AWS
Configured networking and access
Connected to the instance
Completed housekeeping after you ran your demo