
OpenShift Projects and User Management
This guide walks through the process of creating OpenShift projects and assigning users appropriate roles within those projects.
OpenShift uses role-based access control (RBAC) to manage permissions across clusters and projects. Administrators can grant cluster-wide permissions or restrict access to specific namespaces (projects).
This demo is designed for learning and training purposes and demonstrates the basic workflow used by engineers to create projects and assign user permissions inside OpenShift.
It is part of the Turtini Training Loop, a series of short operational guides focused on building practical infrastructure skills.
Contributor: Heather Harwell
Overview
In this demo we will:
Log into the OpenShift console
Access the OpenShift web terminal
Create a new project
Validate users in the cluster
Assign cluster-level roles
Assign project-level roles
Verify role bindings
Estimated time: 5–10 minutes
Architecture Overview
This exercise demonstrates how role-based access control works inside OpenShift.
Administrator
│
▼
OpenShift Console
│
▼
OpenShift CLI (oc)
│
▼
Create Project
│
▼
Assign Roles
│
▼
User Access to Namespace
Step 1 — Log into OpenShift
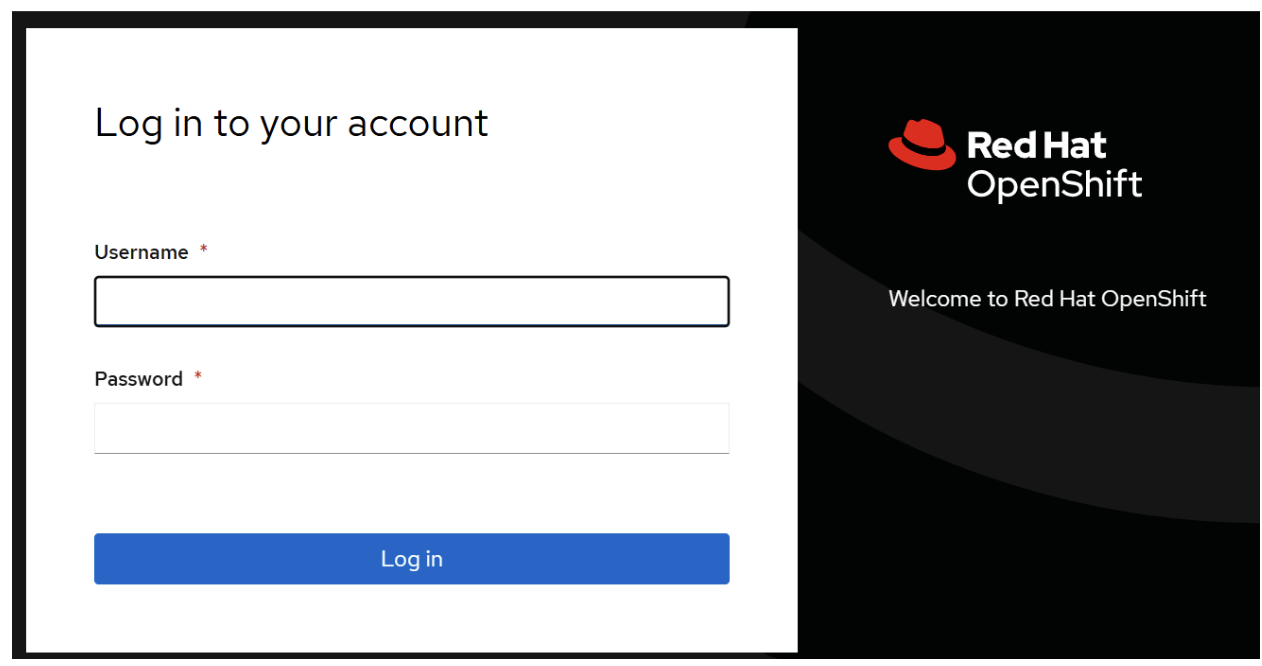
Access the OpenShift console for your environment.
Your username and password will be provided to you.
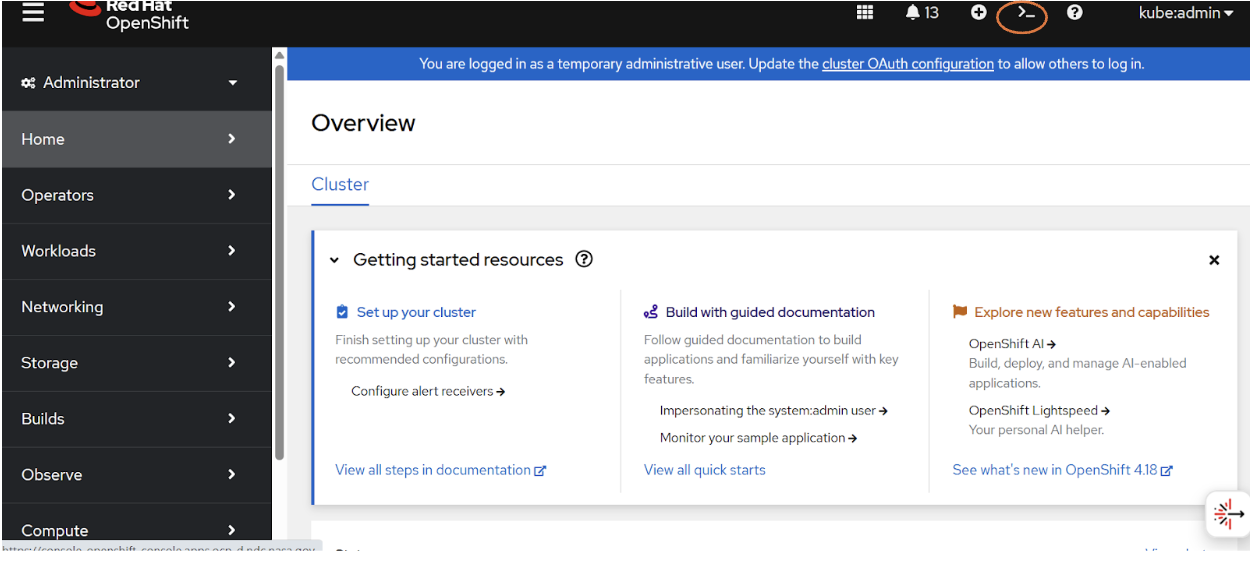
Once logged in, you will see the OpenShift dashboard.
Step 2 — Open the Web Terminal
In the upper-right corner of the console, select the command line terminal icon.
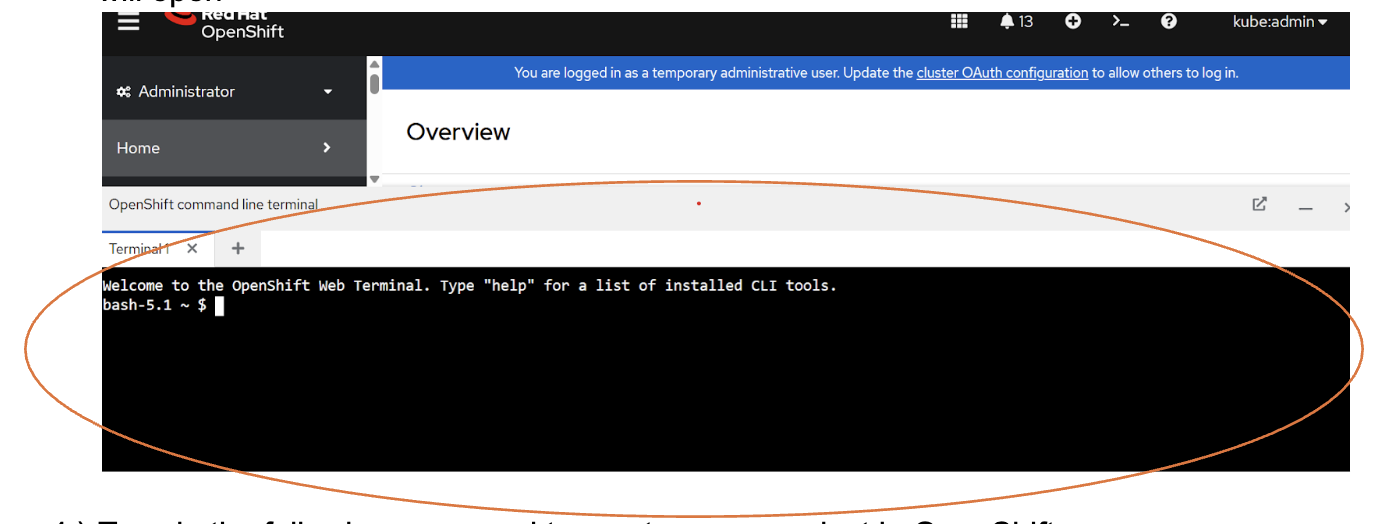
This opens the OpenShift Web Terminal, which allows you to run oc commands directly from the browser.
The terminal will display a shell environment where OpenShift CLI commands can be executed.
Step 3 — Create a New Project
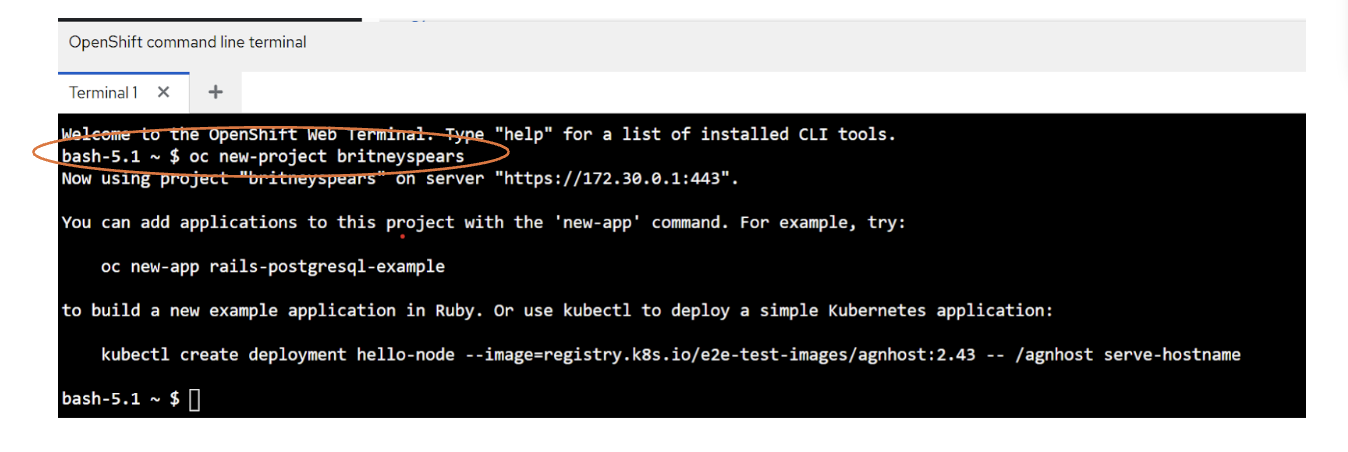
Use the oc command to create a new project.
oc new-project <project-name>
Example:
oc new-project project-britney-spears
Important:
Project names must be lowercase. Uppercase characters will produce an error.
Once executed, OpenShift will create a new namespace for the project.
Example output will confirm the project was created and is now active.
Step 4 — View Available Users
Before assigning permissions, verify which users exist in the cluster.
Run:
oc get users
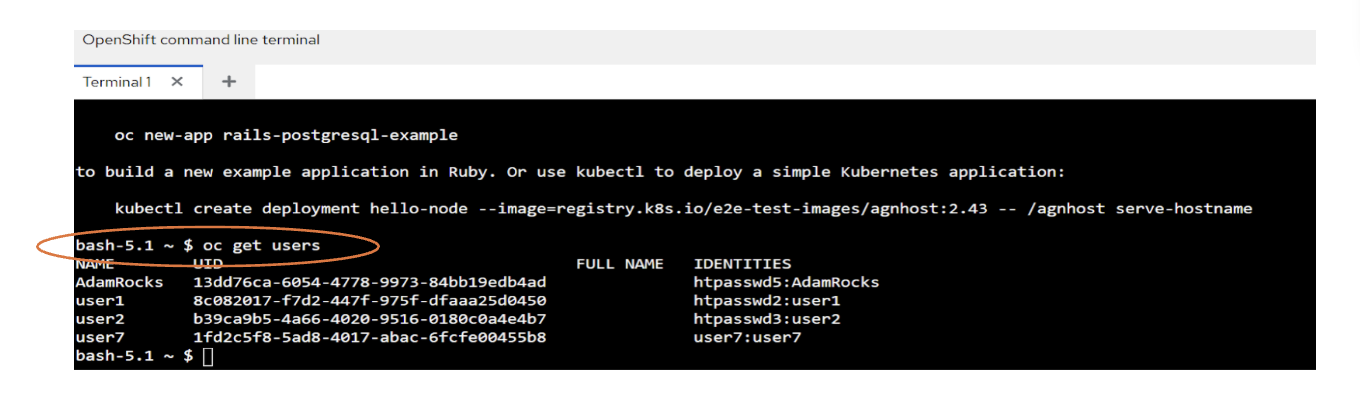
This command displays the list of users currently registered in the cluster.
Example output may include users such as:
user1
user2
admin
These users can now be granted permissions.
Step 5 — Assign a Cluster Role
Cluster roles grant permissions across the entire OpenShift cluster.
Use the following command:
oc adm policy add-cluster-role-to-user <role> <username>
Example:
oc adm policy add-cluster-role-to-user cluster-admin adam-rocks
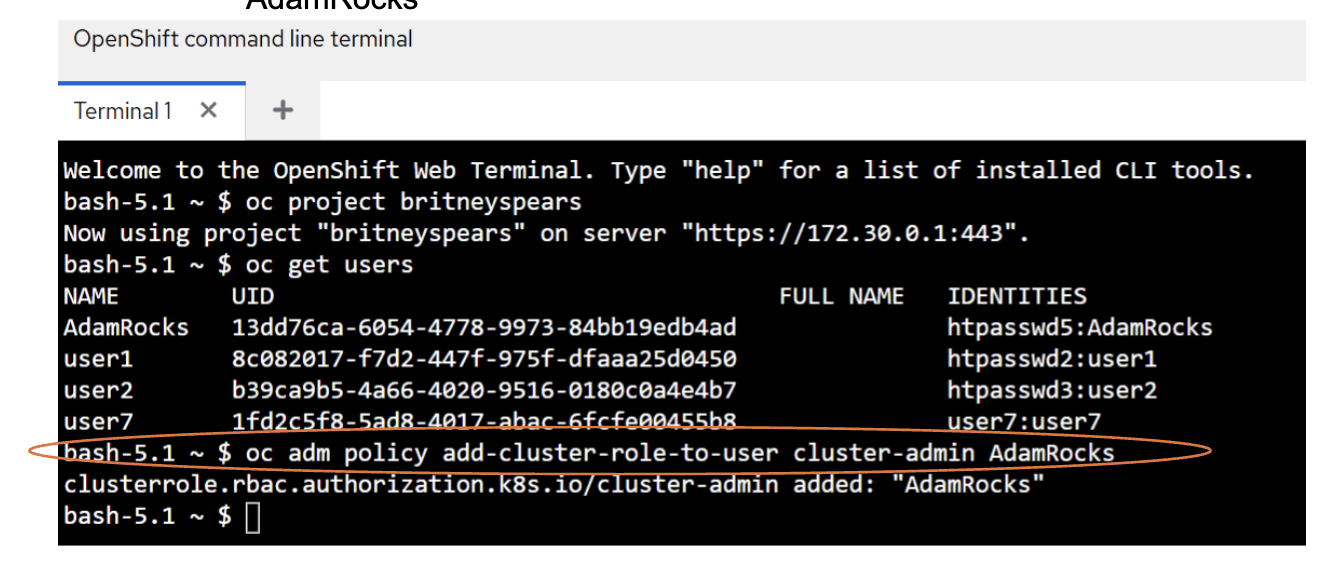
This grants the user cluster-admin privileges, allowing broad administrative control.
Cluster roles should be granted carefully because they provide access across all namespaces.
Step 6 — Assign a Project Role
Project roles provide access within a specific namespace.
Use the command:
oc policy add-role-to-user <role> <username> -n <project>
Example:
oc policy add-role-to-user admin adam-rocks -n project-britney-spears
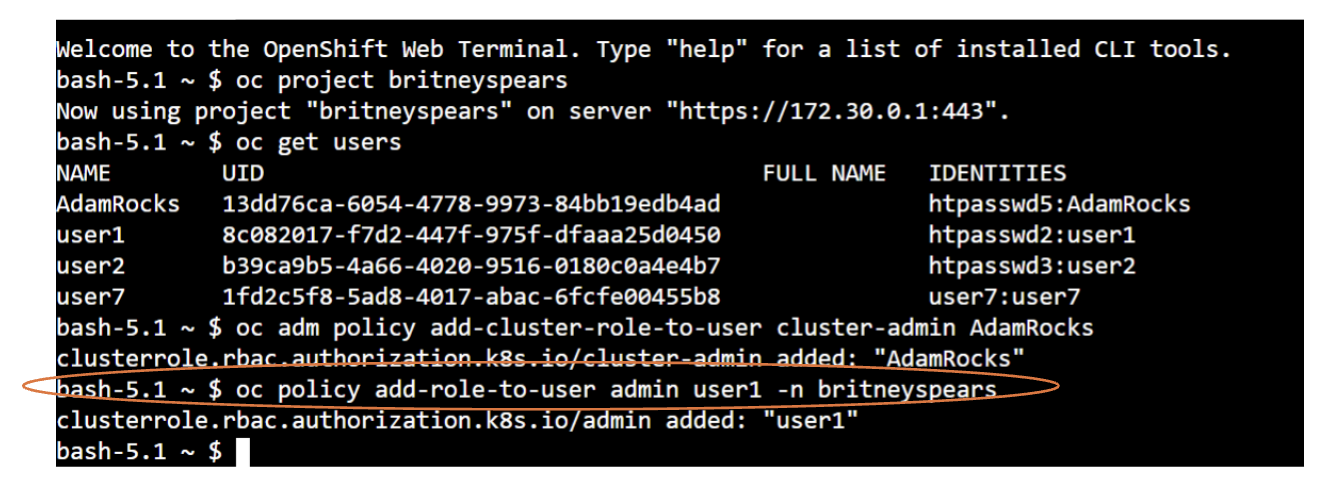
This command:
Assigns the admin role
To user1
Within the demo-project namespace
Project-level roles are commonly used for development teams working inside a specific environment.
Step 7 — Verify Role Bindings
Finally, confirm the role assignment was applied successfully.
Run:
oc describe rolebindings
This command displays the role bindings configured in the namespace.
Example output will show:
Role: admin
User: adam-rocks
Namespace: project-britney-spears
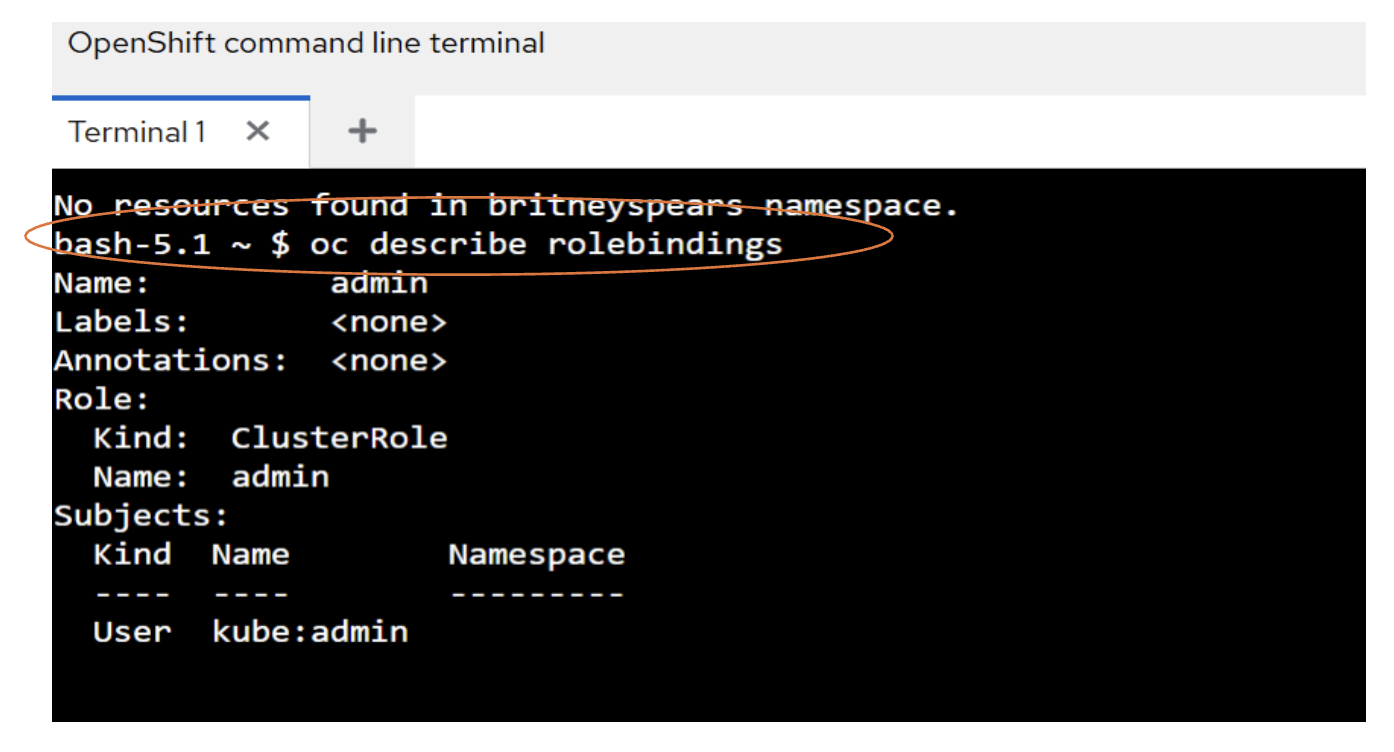
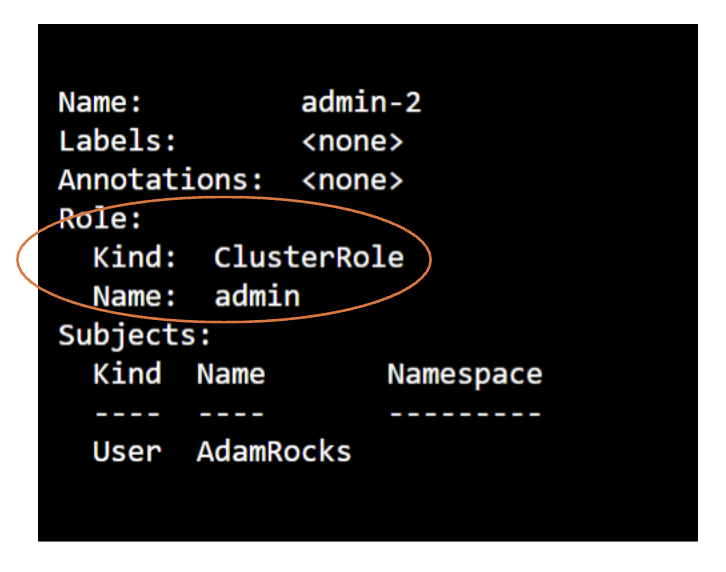
This confirms the user now has the appropriate permissions.
Demo Complete
You have successfully:
Created a new OpenShift project
Verified users within the cluster
Assigned cluster-level permissions
Assigned project-level permissions
Verified role bindings
These steps represent the basic workflow used by administrators to manage user access within OpenShift environments.